Showing posts with label yummy. Show all posts
Showing posts with label yummy. Show all posts
Monday, 21 January 2013


Sunday, 20 January 2013
Saturday, 4 August 2012
All his favourites in one, Birthday Cake.
My lil one turned 2 today and I am in denial. Its seems strange that me, who still cannot believe that she is married and a mum, has a toddler in his twos. Wow! Anyways, this post is not about my denials but about him my superstar, lil Z. So like any other toddler, Z has a couple of things he loves. Wake him up in middle of the night and he will happy to devour them. His favourite foods and my guilty food cause I usually turn to them only when a) he is not eating anything else and b) because its all the "wrong foods" for him. Anyways, since this being a momentous occasion and all, after all you only turn 2 once, I decided to bake him a cake with all his favourites. So, what are his favourites you ask? Lemme list it for you.
- Fruit loops
- Cream cheese frosting
- Chocolate chips
- Sprinkles
- Crayons ( Dont ask, I have crayons with bite marks on them all over the house)
- Cupcakes
So then, I thought and thought and thought as to how I could incorporate all his favourites into one and voila..'All his favourite birthday Day' aka Rainbow cake with cream cheese frosting, decorated with fruit loops, sprinkles and liberally strewn with chocolate chips. 'I left the waxy crayons out and drew inspiration form their lovely colours. Needless to say, I think it was his best birthday yet. :)
Here is what you need,
- One packet white cake mix. Any box cake will do. I used a Pillsbury white cake mix
- Food colouring
For the frosting,
- 8 oz of cream cheese at room temperature
- 1 stick of butter also at room temperature
- 2 cups of icing sugar
- 1 tsp of vanilla essence
For extra garnish,
- 1 small box of Ferraro Rocher
- 1/2 cup semi sweet chocolate chips
- Rainbow sprinkles
- Handful of fruit loops
Method:
- Prepare the cake batter as per the instructions on the box.
- Now divide them into 7 equal parts and add the food colouring of your choice and mix well.
- Now, proceed to put on colour in to the baking tray and as it spreads in the tray, put the next colour on top. Keep putting all the colours in concentric circles ( the cake tray will resemble a dart board at this point) untill all the batter is in the tray.
- Now bake it according to the instructions on the box.
- While it is baking, cream together the cream cheese and butter until light and fluffy.
- Then add the icing sugar and continue to mix it using an electric whisk.
- Now add the vanilla essence and whisk until fluffy.
- Refrigerate the frosting to set a bit.
- Once the cake is baked and cooled, proceed to frost the cake.
- Then decorate it using any of the garnishes mentioned above or just about anything of your choice.


Monday, 15 August 2011
Crumbly silky chocolate pie
The first thing I read today morning was a post by Tara of Butterdish and everything about the post touched me. It was moving and inspiring and it made you wanna bake, not for yourself but someone else. This chocolate pie was a result of that post. Agreed, the post asked for a peanut butter pie but due to certain reasons, I just could not make a trip to the supermarket and so had to make do with what was in my pantry. Well, the pie turned out B E A U T I F U L. It was just like its name, crumbly, silky, chocolaty and felt velvety in the mouth. I wish I could have shared a slice with you, just so that you would know that I am not fibbing. You must try this!
Here are the things you need,
For the crust:


Here are the things you need,
For the crust:
- One 250 gram packet of Bourbon biscuits
- 50 grams of butter
For the filling:
- 2 squares of chocolate bars (approx 250 grams)
- 1/2 cup boiling water
- 1 tbsp gelatin
- 1/4 cup cold water
- 1 tsp vanilla essence
- 1 tbsp zest of orange (for a tangy-ness only)
- 1/2 cup sugar
- 2 eggs, separated (not divorced, only separated..sorry sad joke, I know)
Method:
- Mix together the biscuits and butter together in a food processor.
- Now tip the mixture on to your tart tin and press it in so that it spreads evenly. Make sure it covers the edges of the tin too
- Refrigerate the crust for about 30 minutes.
- Now, mix the gelatin in cold water and allow it to rest for 15 minutes
- Boil 1/2 a cup of water and mix the chocolate in to.
- Once the chocolate is fully melted, add the gelatin and bring the mixture to a simmer.
- Keep stirring until all the gelatin has dissolved.
- Now add 2 egg yolks to the mixture and mix
- Then add the vanilla essence.
- Take off from heat and allow the mixture to cool.
- Now, whip the egg whites with the sugar until it forms still peaks.
- Fold the cooled chocolate in to the mix and pour into the tart tin.
- Refrigerate for 1-2 hours.
- Serve! Yum!


Friday, 12 August 2011
Chicken spring rolls
Well..this one really is a no brainer..something which most of us already know to make, I presume but nonetheless this is my dish of the day. Whats wonderful about this dish is that its multifaceted. Combine it with a good salad and some yummy sauce and its main course. Serve it alongside a drink and it becomes a snack. Pack and send it to school with you and its a kids meal. You can always play with the filling and the protein that you choose to put inside it but what I have done today is a pretty much straightforward version of the dish.
Here is what you need,
Shredded Chicken - 2 cups
Onion - 1 finely diced
Garlic - 3-4 pods finely diced
Carrots - 2 thinly sliced
Beans - 1 cup thinly sliced
Soy sauce - 1 tbsp
Chilly sauce - 1/2 tsp
Eggs - 2
Corn flour- 1 cup
Flour- 2 cup
Bread crumbs - 1 cup
Salt- To taste
Saute the onions and garlic well and add the carrots and beans to it. Continue to cook until the vegetables are half cooked.
Now add shredded chicken and cook. Remember to keep all the vegetables and chicken soft
Now add the sauces and mix well.
Season it with salt. Keep aside.
Now mix the flour,cornflour, one egg and water together and make a batter like a pancake batter (not too think, not too runny)
Now spread it on an oiled pan thinly, in the size of a large pancake.
Spoon a bit of the filling to the center of the pancake and roll it. Take care to tuck in the sides as you fold the pancake to seal off the edges.
Now dip in the roll in a whisked egg and coat it with bread crumbs and fry in oil.
The dipped and crumbed spring rolls can be stored in your freezer for up to 2 weeks and can be fried as and when required.

Here is what you need,
Shredded Chicken - 2 cups
Onion - 1 finely diced
Garlic - 3-4 pods finely diced
Carrots - 2 thinly sliced
Beans - 1 cup thinly sliced
Soy sauce - 1 tbsp
Chilly sauce - 1/2 tsp
Eggs - 2
Corn flour- 1 cup
Flour- 2 cup
Bread crumbs - 1 cup
Salt- To taste
Saute the onions and garlic well and add the carrots and beans to it. Continue to cook until the vegetables are half cooked.
Now add shredded chicken and cook. Remember to keep all the vegetables and chicken soft
Now add the sauces and mix well.
Season it with salt. Keep aside.
Now mix the flour,cornflour, one egg and water together and make a batter like a pancake batter (not too think, not too runny)
Now spread it on an oiled pan thinly, in the size of a large pancake.
Spoon a bit of the filling to the center of the pancake and roll it. Take care to tuck in the sides as you fold the pancake to seal off the edges.
Now dip in the roll in a whisked egg and coat it with bread crumbs and fry in oil.
The dipped and crumbed spring rolls can be stored in your freezer for up to 2 weeks and can be fried as and when required.

Wednesday, 10 August 2011
Stuffed Bananas
Ok, so we haven't done sweet in a while and so today I thought we would make something yummy, sweet! Wanted something exotic and not the everyday cookie, so I ended up making these flavoursome, most definitely sweet stuffed bananas. I admit its not an everyday treat, but on those days when you feel particularly exotic or wanna surprise your guests with a luxuriant dessert, this is the way to go. Very few ingredients required but the product is particularly lovely.
Here are the things you need,
Medium ripe bananas - 3-4
Grated coconut - 1 cup ( I prefer freshly grated coconut to the desiccatied variety because the juices from the freshly grated ones impart such a different flavour to the dish)
Cardamom powder - 1/2 tsp
Granulated Sugar - 3 tbsp
Broken Cashew nuts - 1/4 cup
Raisins - a handful
Butter - 2 tbsp
Oil - For frying
Steam the bananas until tender, but not overtly tender and then mash it.
Divide the mashed bananas into fist size balls and keep aside.
Heat the butter and toss in the nuts and raisins and roast them.
Then add the cardamom powder and the coconut and fry it until the coconut loses more than half of its juices.
Turn off the heat and then add the sugar. Combine it well.
Now, take a banana ball and flatten it using your palm, scoop in some of the coconut mixture to the center and seal off the edges.
Then fry it in oil until lightly brown
I've chosen to do a missile like style while shaping the banana balls, though you may chose the style you like.

Here are the things you need,
Medium ripe bananas - 3-4
Grated coconut - 1 cup ( I prefer freshly grated coconut to the desiccatied variety because the juices from the freshly grated ones impart such a different flavour to the dish)
Cardamom powder - 1/2 tsp
Granulated Sugar - 3 tbsp
Broken Cashew nuts - 1/4 cup
Raisins - a handful
Butter - 2 tbsp
Oil - For frying
Steam the bananas until tender, but not overtly tender and then mash it.
Divide the mashed bananas into fist size balls and keep aside.
Heat the butter and toss in the nuts and raisins and roast them.
Then add the cardamom powder and the coconut and fry it until the coconut loses more than half of its juices.
Turn off the heat and then add the sugar. Combine it well.
Now, take a banana ball and flatten it using your palm, scoop in some of the coconut mixture to the center and seal off the edges.
Then fry it in oil until lightly brown
I've chosen to do a missile like style while shaping the banana balls, though you may chose the style you like.

Tuesday, 9 August 2011
Fried Prawn Patties
So, this recipe is finger licking good. The good thing about this is that its versatile. So, while I've used prawns here, the recipe lends itself fabulously to chicken, meat and even vegetarian options. You surely must try it out now. No excuses!

Here are the things you need,
For the patties:
Rice flour - 1 cup
Fennel seeds - 1/4 tsp
Grated coconut - 1/2 cup
Water - 1 1/2 cups
Salt - 1 tsp
For the filling:
Cooked prawns - 250 grams
Onion - 1 (Finely diced)
Garlic - 3-4 cloves (Finely diced)
Chilly powder - 1 tsp
Turmeric powder - 1/2 tsp
Salt - to taste
Oil for deep frying
In a blender, mix together the grated coconut and fennel seeds thoroughly.
Bring the water to boil in a large bowl.
As it boils, add in the rice flour, the coconut-fennel mix, salt and mix well.
Remove from heat and knead the mix into a soft dough.
Make fist sized balls of dough and keep aside.
Heat a little oil in a pan and add the diced onion and garlic and allow it to saute.
Then add the salt, turmeric and chilly powder to it till the raw smell of the spices disappear.
Now, quickly add the prawns to the pan and mix well.
Since the prawn is already cooked, we only need to keep the pan on heat until all the spices and prawns are well mixed.
Heat oil in a deep bottomed dish. The oil must be really hot so that when we fry the patties, it does not soak up excess oil.
While the oil is heating up, spread a little oil in you hands and flatten out the dough balls into approximately a pancake size using your hands.
Scoop a little of the prawn mix into the center of the dough and bring the edges of the dough together. Seal the edges well by pressing on it hard, so that no oil gets inside the patty as we fry it.
Now, drop the patty into the oil and fry it until it turns nice and golden brown.
Serve.
While, I've chosen to do a half moon kinda shape for the patty, you could mold them into balls, squares or basically any shape that you fancy. The key here however is that no matter what shape you choose, remember to seal the edges cause otherwise oil will enter the filling and your patties will become soggy.

Monday, 8 August 2011
Creamy coconutty wheat soup
A yummy, creamy coconut soup that is at once both rich yet extremely healthy. Its flavours are amazing and its so filling that a small serving can be a meal in itself. Sometimes combined with a curry, this soup is a staple during the month of Ramzan, specially in the southern part of India.

Here are the things you will need,
Broken wheat/ Whole wheat - 1/2 cup
Boneless Chicken - 2-4 bite sized pieces
Coconut Milk - 2 cups
Ginger - 1 small piece
Cinnamon stick - 1/2 a stick
Shallots - 3-4 finely diced
Butter - 4 tsp
Salt - to taste
Salt - to taste
Cook the wheat, chicken, stick of cinnamon and the piece of ginger together till the wheat is well cooked. If using a pressure cooker, the average time for cooking is about 15 minutes.
1/2 a cup of wheat usually requires about 2 cups of water to cook. So remember to add water according to your measure of wheat.
Once well cooked, remove the ginger and cinnamon from the mix and blend the remaining items.
Pass it through a strainer.
Now, add the coconut milk to the mixture and mix well. Slightly simmer it for a minute. Season
On a separate pan, add the butter and saute the shallots till it becomes translucent.
Now sprinkle the butter sauteed shallots on to the soup and serve.
The soup is just perfect in itself but for those lovers of spicy, try adding a a few spoonfuls of your left over chicken/beef/mutton curry to the soup and lo behold its godsend..Really!

Friday, 5 August 2011
Creamy Spinach
Here is yet another recipe to turn those reluctant veggie eaters into religious veggie eaters. Yum! Creamy Spinach!
Here are the things you need:
Spinach - 1 bunch, washed and dried
Onion - 1 (Roughly diced)
Garlic - 2-3 cloves (Roughly diced)
Lemon - One half
Cream - 1 cup
Butter - 2 tsp
Salt - To taste
In a pan, heat oil and sweat the onions and garlic.
Then add the cream and butter to the mix along with the salt and allow the mix to reduce slightly.
Once the reduction has begun, add the spinach to it and let the leaves wilt down.
Once the spinach has begun to wilt, remove the pan from fire.
Squeeze one half of the lemon on to the spinach and toss it well so that the sauce spreads on the leaves evenly.
This dish works perfectly with almost any main course and better still, almost any veggies can be used instead of the spinach. All you need to do is keep in mind the difference in cooking time of the different veggies.
 Pic courtesy : Diana's kitchen
Here are the things you need:
Spinach - 1 bunch, washed and dried
Onion - 1 (Roughly diced)
Garlic - 2-3 cloves (Roughly diced)
Lemon - One half
Cream - 1 cup
Butter - 2 tsp
Salt - To taste
In a pan, heat oil and sweat the onions and garlic.
Then add the cream and butter to the mix along with the salt and allow the mix to reduce slightly.
Once the reduction has begun, add the spinach to it and let the leaves wilt down.
Once the spinach has begun to wilt, remove the pan from fire.
Squeeze one half of the lemon on to the spinach and toss it well so that the sauce spreads on the leaves evenly.
This dish works perfectly with almost any main course and better still, almost any veggies can be used instead of the spinach. All you need to do is keep in mind the difference in cooking time of the different veggies.
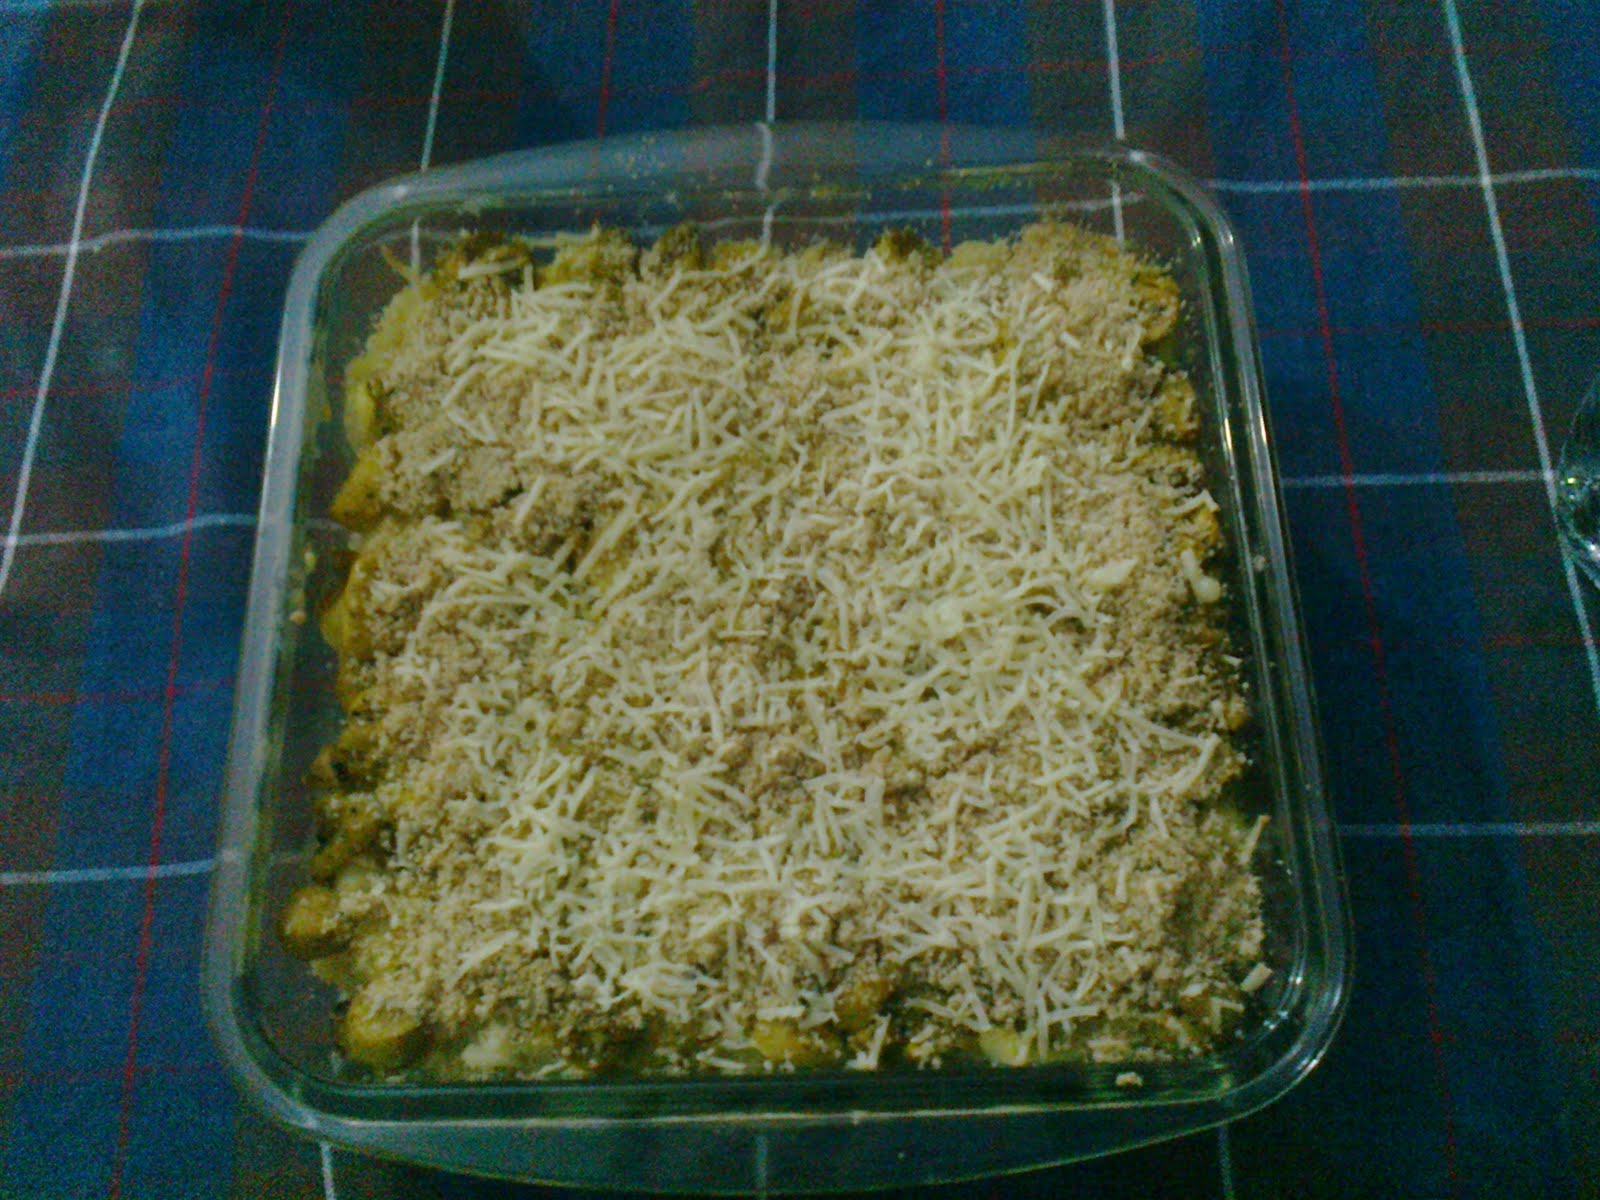
Mac n Cheese with Veggie surprise
So, who doesnt like Mac n Cheese. Kids especially gobble it up without a question, so I thought maybe I could hide in a layer of veggies in it and make the treat a tad more healthy.
Here is what you need:
Macaroni - 200 grams
Butter - 50 gram
Mushrooms - 500 gram
Milk - 1 cup
Flour - 1/4 cup
Pepper - 1 tsp
Turmeric - 1/2 tsp
Cheese - 4 cubes grated
Onions - 1(Finely diced)
Garlic - 3-4 cloves (Finely diced)
Bread Crumbs - A little
Salt - To taste
Boil the macaroni as per the instructions on the pack and toss it with olive oil and keep aside. Remember to lightly salt the macaronis while cooking.
Now heat a pan and add the butter to it. Add a tsp of olive oil too to raise the burning point of the butter.
Now saute the onions and garlic in it.
Gradually sprinkle flour in to it until well combined.
Now remove from heat and very slowly add the milk to the mixture to form a nice sauce.
Bring the mix back to simmer and add the cheese until all of cheese melts. (Remember to save a same portion of the cheese for sprinkling on top of the final dish)
Now add the cooked macaronis into the sauce and give it a good mix.
In another pan, pour a little oil and add the mushrooms along with the turmeric, salt and pepper.
Put a lid on it and cook the mushrooms until half tender.
In a baking tray, spoon in the in the macaroni mix. Top it with the sauteed mushrooms. Finish it off by sprinking bread crumbs on top and then a little bit of grated cheese.
Bake at 175 degree Celsius for 20 minutes.
Let it rest for 5 minutes before serving.

Here is what you need:
Macaroni - 200 grams
Butter - 50 gram
Mushrooms - 500 gram
Milk - 1 cup
Flour - 1/4 cup
Pepper - 1 tsp
Turmeric - 1/2 tsp
Cheese - 4 cubes grated
Onions - 1(Finely diced)
Garlic - 3-4 cloves (Finely diced)
Bread Crumbs - A little
Salt - To taste
Boil the macaroni as per the instructions on the pack and toss it with olive oil and keep aside. Remember to lightly salt the macaronis while cooking.
Now heat a pan and add the butter to it. Add a tsp of olive oil too to raise the burning point of the butter.
Now saute the onions and garlic in it.
Gradually sprinkle flour in to it until well combined.
Now remove from heat and very slowly add the milk to the mixture to form a nice sauce.
Bring the mix back to simmer and add the cheese until all of cheese melts. (Remember to save a same portion of the cheese for sprinkling on top of the final dish)
Now add the cooked macaronis into the sauce and give it a good mix.
In another pan, pour a little oil and add the mushrooms along with the turmeric, salt and pepper.
Put a lid on it and cook the mushrooms until half tender.
In a baking tray, spoon in the in the macaroni mix. Top it with the sauteed mushrooms. Finish it off by sprinking bread crumbs on top and then a little bit of grated cheese.
Bake at 175 degree Celsius for 20 minutes.
Let it rest for 5 minutes before serving.
Monday, 1 August 2011
Easy Peasy Yummy Brownies
This is such an easy recipe and the best part is that there is hardly any prep time required. Trust me, once you try it, you will be hooked for life.
Things you need:
Flour - 3/4 cup
Butter -1/2 cup
Vanilla extract - 1 tsp
Eggs - 2
Sugar - 1/2 cup
Semi Sweet chocolate - 120 grams
Salt - a pinch
Ganache frosting
Butter - 1/4 cup
Chocolate - 100 grams
Cream - 3 tbsp (optional)
For the brownie:
Pre-heat oven to 170 degree Celsius.
On a double boil melt sugar and chocolate and mix well.
Remove from heat and quickly add the sugar and mix well.
While the mix is still warm add the eggs one by one and whisk well.
Then add the flour and salt mix and combine it well with the chocolate mix.
Pour it in to the greased pan and bake for 25 minutes or until a toothpick comes out clean.
For the ganache:
Melt chocolate, cream and butter on double boil till it mixes well. Then remove from heat and pour over the cooled brownie and refrigerate for 10 minutes till the frosting hardens. Cut into squares and serve.
 Pic courtesy, Finecooking.com
Things you need:
Flour - 3/4 cup
Butter -1/2 cup
Vanilla extract - 1 tsp
Eggs - 2
Sugar - 1/2 cup
Semi Sweet chocolate - 120 grams
Salt - a pinch
Ganache frosting
Butter - 1/4 cup
Chocolate - 100 grams
Cream - 3 tbsp (optional)
For the brownie:
Pre-heat oven to 170 degree Celsius.
On a double boil melt sugar and chocolate and mix well.
Remove from heat and quickly add the sugar and mix well.
While the mix is still warm add the eggs one by one and whisk well.
Then add the flour and salt mix and combine it well with the chocolate mix.
Pour it in to the greased pan and bake for 25 minutes or until a toothpick comes out clean.
For the ganache:
Melt chocolate, cream and butter on double boil till it mixes well. Then remove from heat and pour over the cooled brownie and refrigerate for 10 minutes till the frosting hardens. Cut into squares and serve.

Subscribe to:
Posts (Atom)
