Showing posts with label baking. Show all posts

Saturday, 4 August 2012

All his favourites in one, Birthday Cake.


My lil one turned 2 today and I am in denial. Its seems strange that me, who still cannot believe that she is married and a mum, has a toddler in his twos. Wow! Anyways, this post is not about my denials but about him  my superstar, lil Z. So like any other toddler, Z has a couple of things he loves. Wake him up in middle of the night and he will happy to devour them. His favourite foods and my guilty food cause I usually turn to them only when a) he is not eating anything else and b) because its all the "wrong foods" for him. Anyways, since this being a momentous occasion and all, after all you only turn 2 once, I decided to bake him a cake with all his favourites. So, what are his favourites you ask? Lemme list it for you.
  1. Fruit loops
  2. Cream cheese frosting
  3. Chocolate chips
  4. Sprinkles
  5. Crayons ( Dont ask, I have crayons with bite marks on them all over the house)
  6. Cupcakes
So then, I thought and thought and thought as to how I could incorporate all his favourites into one and voila..'All his favourite birthday Day' aka Rainbow cake with cream cheese frosting, decorated with fruit loops, sprinkles and liberally strewn with chocolate chips. 'I left the waxy crayons out and drew inspiration form their lovely colours. Needless to say, I think it was his best birthday yet. :)
Here is what you need,
  • One packet white cake mix. Any box cake will do. I used a Pillsbury white cake mix
  • Food colouring
For the frosting,
  • 8 oz of cream cheese at room temperature
  • 1 stick of butter also at room temperature
  • 2 cups of icing sugar
  • 1 tsp of vanilla essence
For extra garnish,
  • 1 small box of Ferraro Rocher
  • 1/2 cup semi sweet chocolate chips
  • Rainbow sprinkles
  • Handful of fruit loops
Method:
  1. Prepare the cake batter as per the instructions on the box.
  2. Now divide them into 7 equal parts and add the food colouring of your choice and mix well.
  3. Now, proceed to put on colour in to the baking tray and as it spreads in the tray, put the next colour on top. Keep putting all the colours in concentric circles ( the cake tray will resemble a dart board at this point) untill all the batter is in the tray.
  4. Now bake it according to the instructions on the box.
  5. While it is baking, cream together the cream cheese and butter until light and fluffy.
  6. Then add the icing sugar and continue to mix it using an electric whisk.
  7. Now add the vanilla essence and whisk until fluffy.
  8. Refrigerate the frosting to set a bit.
  9. Once the cake is baked and cooled, proceed to frost the cake.
  10. Then decorate it using any of the garnishes mentioned above or just about anything of your choice.


Monday, 19 September 2011

Strawberry and Cream Cake

You know how sometime you need a break from things you love just to renew that love and not feel satiated? Well, that feeling hit me recently and I needed to take a break. A break from chocolate that is. I absolutely love chocolate and it would so be among the list of things that I would take with me to a deserted island but lately, I've just been having so much of it that I feel my enthusiasm for it dip a little bit. I no longed seem to be calling dibs on the last slice of chocolate cake or that last bite of absolutely sinful dark chocolate and even worse, I seem to be the one passing on the last bite to someone else. **Gasp** and so, I took a break and decided to do something completely non-chocolatey and what can be more non chocolatey than Strawberries and Cream. Plus, I had agreed to bake something for a friend and so thought this could be my chance for the break from chocolate. I have to admit, I din't really expect this cake to be amazing or anything. Seriously, what chance did poor strawberries have against chockies but they surprised me. They seems very moist, melt in your mouth and very very light. The only downside that I saw to the cake was that it was a tad too sweet for my liking and thats really my fault cause when I bought the cream for the cake, I din't really check to see if the cream was sweetened or not. Well mine was and that I think brought the cake down a couple of notches. So careful with your cream selection. Anyways, here are the things you need.

For the cake,

  • 200 grams of flour
  • 25 grams of cornflour
  • 3 tsp of baking powder
  • a pinch of salt
  • 4 eggs
  • 1 tbsp vanilla essence/extract
  • 225 gram butter (about 2 sticks and little more)
  • 1/4 cup of milk
  • 2 cups of sugar
For the filling,

  • 1 cup of fresh strawberries sliced or a cup of strawberry preserve.
  • 400 mils of cream whipped until stiff.

Method,

  1. Preheat the oven to 180 degree celcius.
  2. Cream together the butter and sugar until fluffy.
  3. Then add the vanilla extract and whisk.
  4. Now whisk in the eggs one by one. Add a spoonful of flour in between each addition of egg.
  5. Then, fold in the remaining flour, cornflour and baking powder.
  6. Once its all folded in together, add the milk and slightly loosen up the batter.
  7. Pour it into a baking tin and bake for 35 minutes or until the top of the cake browns and the tester comes out clean.
  8. Remove and let it cool completely.
  9. Then using a sharp knife, slice the cake into two equal halves. (You could actually save the trouble slicing the cake if you have two identical cake tins, in which case, all you need to do is spoon in the batter equally in to both the tins. Also, remember to lower to baking time to about 25 minutes)
  10. Spread the strawberries (fresh or preserved) equally on bottom half of the cake.
  11. In a bowl, whisk the cream until it forms soft peaks and then spread it generously over the strawberries.
  12. Now sandwich together the cakes and voila! its done.
  13. Dig in. 


I wish I could have shared the pic of a slice of the cake with you. But like I said, I din't make it for myself and so when I took the cake over to her place and sliced it up, I forgot to take the pic. But take my word for it, it was so pretty. Golden cake with white and pink inside. Pretty as a picture!

Monday, 12 September 2011

Apple Tart

I had never tasted an apple tart. Until yesterday! Yup. Always shied away from it and picked another dessert. It was instinctive. Nothing about an apple tart yells out to me and still all my friends and my family swear by it. They claim, you cannot go wrong with it. Its a safe dessert. And so, yesterday when I found my fruit basket dangerously over stuffed with apples, I thought it was perhaps time to tackle the apple tart monster! Grab it by its horns and devour it to submission. Well, atleast that was the plan but alas, its just not my monster. Know what I mean? I made the tart shell from scratch, lovingly made the fillings, waited to get it baked and the result..it was blah in my mouth. Don't get me wrong, apparently the dessert was delicious. It had to be cause my Mum who always says no to dessert went in for seconds and there is no more tart left but still to me it was blah.

I always feel that a good dessert has to overwhelm you. There should something about it that explodes in your mouth. It could be the flavours, its subtlety, a surprise element, anything but it has to impress you and that's where I felt my apple tart failed. Atleast to me. Well, no more apple tarts for me and like I said, I'll never get around this monster but thats just cause, this is just not my monster. Nonetheless, if you like apple tarts then here are the things you need,

For the shell,

  • 250 grams of flour
  • 125 grams of cold and cubed butter
  • 1 tbsp of water
  • a pinch of salt
For the filling,


  • 3-4 large apples sliced along the length
  • 25 grams of butter + 25 grams of sugar
  • 250 mils of cream
  • 100 grams of sugar (or more if you like it really sweet)
  • 1 egg
  • 1 tsp vanilla extract

Method:

  1. Mix together the all the ingredients for the tart shell and press them together. Do not knead as it can make the shell a little tough. Press them well, between cling films and refrigerate for atleast 2 hours.
  2. Then roll it out to desired thickness and line your tart tray with it. Trim of the excess from the edges.
  3. Now, cut the apples lengthwise and line the prepared shell with it.
  4. Mix together the butter and sugar and brush all over the apples well. Alternately, you could dip the apples in this mixture first and then line the tart tray with it.
  5. Now in an oven preheated to 220 degree Celsius, bake the tart for 10 minutes.
  6. Then reduce the temperature to 200 degree Celsius and bake for further 20 minutes.
  7. In the meanwhile, whisk together the cream, sugar, egg and vanilla extract.
  8. Once the tart has been baked for the required 20 minutes, remove from oven and pour the cream mix all over it until the apples are submerged in it.
  9. Now return the tart to oven for another 10 more minutes.
  10. Remove and serve while slightly warm.


Sorry about the really really bad photos. Lack of inspiration plus the lack of a good camera can do this to us! :(


Wednesday, 31 August 2011

Cream Cheese Brownies

Oh my God! I dont know about you but I did not know about cream cheese brownies until today and boy was it a revelation or what! I am hooked and I dont think I can go back to normal brownies anymore. The saltiness of cream cheese breaking out through the intense taste of sinfully dark cocoa is, well, indescribable. You have to taste it to believe it. If you are a fan of cheese and fan of chocolate like I am, then this one is for you.  I had even hardcore cream cheese haters reaching out for seconds. I can't say more, except..yummmmmmmmmmmmmmmm!!!

Here is what you need,

  • About 6 overflowing teaspoons of cream cheese/cheese spread
  • 100 grams of milk chocolate
  • 75 grams of cocoa powder
  • 1/2cup of flour
  • 2 eggs
  • 1 cup granulated sugar
  • one stick of butter
(Gosh, my measures are all over the place. But I swear, I will get better soon! )

Method:

  1. In a saucepan,over medium heat, melt together the butter and chocolate.
  2. Then take it off the heat and while still hot, stir in the cocoa powder and leave it to cool.
  3. In another bowl, beat together the eggs and sugar.
  4. Then beat in the chocolate mix to it. Combine well.
  5. Now slowly sift in the flour and continue to beat the mixture until everything has combined well.
  6. In your brownie tray lined with foil, pour in half of the batter.
  7. Then spoon in the cream cheese equidistantly.
  8. Pour the remaining batter. 
  9. Now bake the brownies for about 20 minutes in oven preheated to 170 degree Celsius, until a toothpick when inserted comes out with little gooey mix on it.
  10. Leave the brownies to cool and then leave it in the freezer for about 10-15 minutes.
  11. Cut into squares and prepare to be absolutely floored by it! (or so I hope!)


Tuesday, 30 August 2011

Nigella's Mini Key Lime Pie

Well, as you can probably guess, I have an abundance of lime around me and so, I'm doing the best thing I can do with it, make pie! :) :) That and the fact that I got gifted Nigella's ' How to be a Domestic Goddess', which is filled with many many of such lime n lemony treats. Its truly a simple recipe and what I like about it is because we make it in small tart tins, it gives us scope for experimentation. The basic recipe stays the same, but you can always add different flavouring agents to it and so you end up a dozen or more pies, all in different flavours! An assorted pie tray of sorts. Well, I tried many of them. Tried the basic lime pie, key lime pie, orange pie, passion fruit pie and pineapple pie. Stayed on course with tropical fruit though. Its really simple, you should most definitely try it. You don't even need freshly squeezed juice to get the flavour, packaged organic juice works just fine. Nonetheless the name of the post is Nigella's Mini Key Lime Pie cause, well it is her recipe after all and all I've done is make changes to it.

Here is what you need,


  • 1 can of condensed milk
  • 2 egg yolks
  • 2 egg whites
  • 250 gram digestive biscuits
  • 100 grams of butter
  • about 4 tbsp of key lime/lime/pine apple/passion fruit/orange juice (Not all at the same time but you know that already. However, I wonder if adding spoonful of each would give it a carribean flavour?? Hmmm..I wonder)
  • A pinch of salt
Method:

  1. Pulse the digestive biscuits and butter together in a food processor until it forms nice buttery crumbs.
  2. Then press it into your mini tart tins. Take care to line the sides too.
  3. Leave in the fridge for atleast 30 minutes.
  4. Pre heat the oven to 170 degree Celsius.
  5. In a bowl, whisk the egg yolks together until it becomes thick.
  6. Continue whisking and add the condensed milk and the fruit juice of your choice. Mix well.
  7. In a different bowl, beat the egg whites plus the salt until it forms soft peaks.
  8. Now fold the whites in to the yolk mixture.
  9. Pour it into the biscuit base and bake for about 10-12 minutes.
  10. Leave it to cool completely. Refrigerate if possible.
  11. Serve! Yum!


The only disappointment I had with these pies, and it was more my fault than theirs, was that they looked a bit boring! I expected my lime pie to be green and my orange pie to be, well, orange and so on. I know I am being silly but really, these neutral colours broke my heart a little.:(

Monday, 29 August 2011

Simple Syrupy Lemon Cake

Notice how the most simple in life are the most worthwhile? Like you could party with the celebrities in the coolest clubs, yet it is a cuppa coffee you shared with a long lost friend that means more. Or how you can stock up on all the latest gizmos and phones and all that but there is nothing quite like a looooooong conversation made on your landline phone. Or you could sign up to a million social networking sites to keep in touch with friends but   it doesn't even to begin to hold a torch to a letter from a pen friend. A date could take you to the choicest restaurant and buy you the most expensive dinner but its most often the cab ride home that makes you wanna see him again.  There is nothing more appealing than holidaying abroad, well perhaps there is one thing more appealing, coming back home to your familiar bed. You get the drift of what I'm trying to say now, don't you? Well, just like that, you could make the fanciest cakes in the world with the most amazingly sinful frosting, yet there is nothing about it that warms your heart like a homemade syrupy lemon cake.

Made it yesterday after eons and it felt familiar, it felt nice, it felt like home.


Here is what you need,


  • 11/2 cups of flour
  • The zest of one lemon
  • 2 tsp baking powder
  • 2 eggs
  • 4 tbsp milk
  • 3/4 stick of butter
  • juice from 1 1/2 lemons
  • 100 grams of icing sugar
Method:
  1. Preheat the oven to 190 degree celsius.
  2. Cream together the butter and sugar until fluffy.
  3. Then add the eggs one by one and the zest of the lemon and mix well.
  4. Into it add the flour and baking powder and mix really well.
  5. Finish it off with milk and once again mix well.
  6. Pour the thick patter on to a greased and floured baking tin and bake for 40 minutes.
  7. In the meanwhile, mix together the lemon juice and icing sugar on low heat, until all the icing sugar melts and a lemony syrup is formed.
  8. Once the cake is baked, using a tooth pick or fork, poke holes all over the cake.
  9. Now pour the lemon syrup over the cake, making sure it reaches all the corners.
  10. Let it cool until all the syrup has been pulled in by the cake.
  11. Then, Dig in!!! 
**Note: I baked two cakes in a go, and so made a variation with the second cake. I used passion fruit for the second one and the only difference I made to recipe was to omit the lemon zest from the batter and instead add 1 tbsp of passion fruit juice. Also, for the syrup, lemon juice was replaced with passion fruit juice. Dare I say, the passion fruit version was slighlty more yummier than its lemony cousin. But I've featured the lemony cousin here cause its more "home" than passion fruit will ever be.


Friday, 5 August 2011

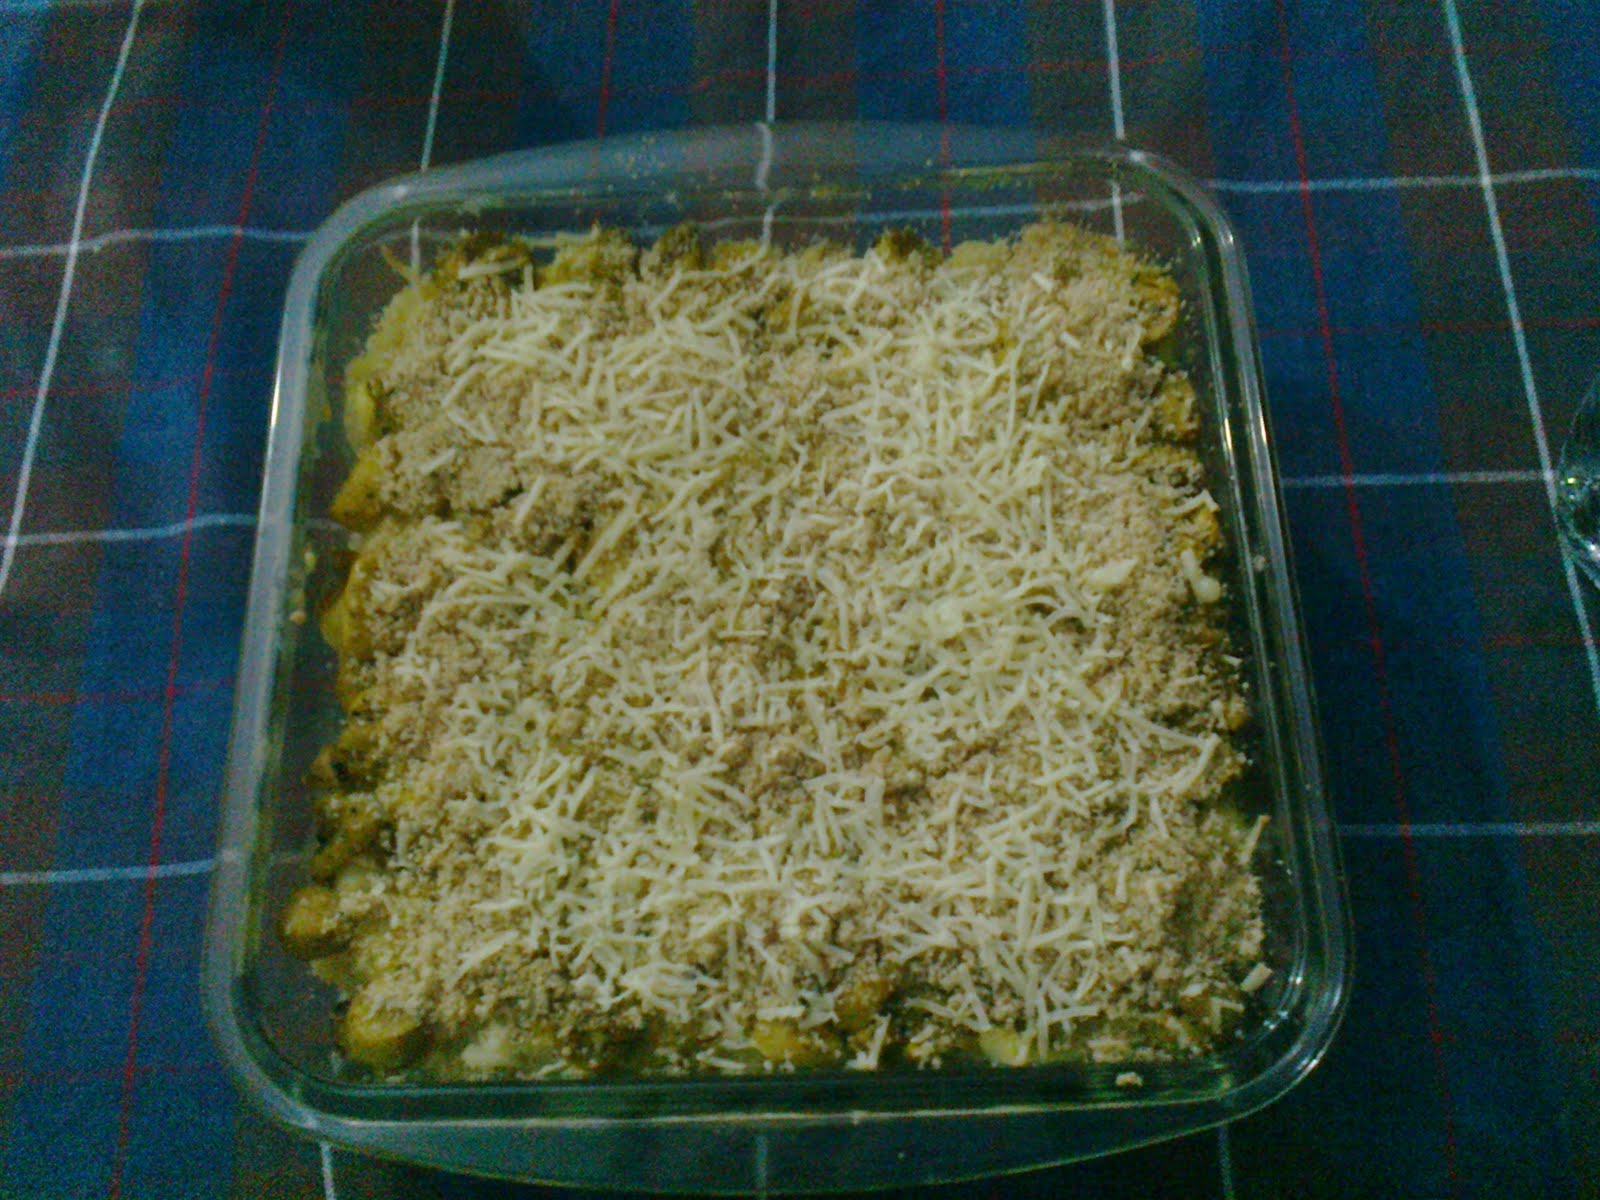
Mac n Cheese with Veggie surprise

So, who doesnt like Mac n Cheese. Kids especially gobble it up without a question, so I thought maybe I could hide in a layer of veggies in it and make the treat a tad more healthy.

Here is what you need:

Macaroni - 200 grams
Butter - 50 gram
Mushrooms - 500 gram
Milk - 1 cup
Flour - 1/4 cup
Pepper - 1 tsp
Turmeric - 1/2 tsp
Cheese - 4 cubes grated
Onions - 1(Finely diced)
Garlic - 3-4 cloves (Finely diced)
Bread Crumbs - A little
Salt - To taste

Boil the macaroni as per the instructions on the pack and toss it with olive oil and keep aside. Remember to lightly salt the macaronis while cooking.
Now heat a pan and add the butter to it. Add a tsp of olive oil too to raise the burning point of the butter.
Now saute the onions and garlic in it.
Gradually sprinkle flour in to it until well combined.
Now remove from heat and very slowly add the milk to the mixture to form a nice sauce.
Bring the mix back to simmer and add the cheese until all of cheese melts. (Remember to save a same portion of the cheese for sprinkling on top of the final dish)
Now add the cooked macaronis into the sauce and give it a good mix.

In another pan, pour a little oil and add the mushrooms along with the turmeric, salt and  pepper.
Put a lid on it and cook the mushrooms until half tender.

In a baking tray, spoon in the in the macaroni mix. Top it with the sauteed mushrooms. Finish it off by sprinking bread crumbs on top and then a little bit of grated cheese.
Bake at 175 degree Celsius for 20 minutes.
Let it rest for 5 minutes before serving.


Thursday, 4 August 2011

Stuffed Bun

 Here is another easy snack. A svaoury snack this time. Easy and quick to make, though there is not much baking involved unless you decide to bake the bun yourself, in which case, the recipe turn not so easy. :)

Things you need:

Buns
Onions - 1 (Finely diced)
Garlic - A whole head (Finely diced)
Ginger - a small piece
Chopped Beef - 500 grams
Salt- to taste
Egg - 1 (to coat the buns)
Chilly powder - 1 tbsp
turmeric powder - 1 tsp

Place the beef in pan and add salt, chillie powder and turmeric powder and leave it on fire until well cooked. Alternately, you could use a pressure cooker and cook the beef until tender.
Once cooked, place the beef in food processer and finely mince it.
Now heat a pan and saute the onions in butter/oil until they turn translucent.
Then add the diced ginger and garlic and saute them till they turn brown
Now, add the minced beef to the pan and gently fry it.
You can also add a bit of cilantro or celery to give it some extra flavour. .
Keep Aside until to cools down slightly.
Now slit the buns 3/4ths way to enable stuffing the beef.
Pack the buns tightly with the fried beef mince and press the buns between both your palms to keep it firm.
Then brush the buns with a whisked egg.
You can now either fry the buns lightly in oil or can place in on a baking tray and bake for roughly 10 minutes at 150 degree Celsius.

The advantage here is that the stuffed bun (before the baking/frying stage) can be made and stored for a few days. Its a great snack and its very filling too.


I know. the pic doesn't look it but trust me, those buns were delicious!!


Tuesday, 2 August 2011

Marble Cake

One of the simplest tea time treats. Stores well and liked by almost everyone.

Things you need:

Butter - 2/3 cups (but really you can never have too much butter.)
Sugar - 1 cup
Eggs - 2
Flour - 1 1/4 cup
Baking soda - 1/2 tsp
Baking powder - 1 tsp
Cocoa - 4 tsp
Curd - 1 cup
Orange essence - 1 tsp ( i decided to give my marble cake a twist and replaced vanilla with orange essence. If you are not a fan of orange or if you like the traditional way, stick to vanilla essence)

Pre heat oven to 180 degree Celsius
Cream butter and sugar until fluffy.
Then add the eggs one by one and whisk until the mixture is light and airy.
Then add the curd and whisk for a further 50 seconds on medium speed. Do not whisk excessively lest the mixture loose its air.
Now add the essence and mix with a spoon.
Fold in a mixture of flour, baking soda, baking powder in to the egg mix gently.
Once the mixture is well combined, divide the mix into two portions.
Fold in the cocoa to one part.
Now on a well greased baking tray, pour in the mixes alternately.
Once done, drag a toothpick through the mix to create the marble effect.
Bake for 40 minutes.
Serve.


Disqus for Cook's the word