Wednesday 31 August 2011

Cream Cheese Brownies

Oh my God! I dont know about you but I did not know about cream cheese brownies until today and boy was it a revelation or what! I am hooked and I dont think I can go back to normal brownies anymore. The saltiness of cream cheese breaking out through the intense taste of sinfully dark cocoa is, well, indescribable. You have to taste it to believe it. If you are a fan of cheese and fan of chocolate like I am, then this one is for you.  I had even hardcore cream cheese haters reaching out for seconds. I can't say more, except..yummmmmmmmmmmmmmmm!!!

Here is what you need,

  • About 6 overflowing teaspoons of cream cheese/cheese spread
  • 100 grams of milk chocolate
  • 75 grams of cocoa powder
  • 1/2cup of flour
  • 2 eggs
  • 1 cup granulated sugar
  • one stick of butter
(Gosh, my measures are all over the place. But I swear, I will get better soon! )

Method:

  1. In a saucepan,over medium heat, melt together the butter and chocolate.
  2. Then take it off the heat and while still hot, stir in the cocoa powder and leave it to cool.
  3. In another bowl, beat together the eggs and sugar.
  4. Then beat in the chocolate mix to it. Combine well.
  5. Now slowly sift in the flour and continue to beat the mixture until everything has combined well.
  6. In your brownie tray lined with foil, pour in half of the batter.
  7. Then spoon in the cream cheese equidistantly.
  8. Pour the remaining batter. 
  9. Now bake the brownies for about 20 minutes in oven preheated to 170 degree Celsius, until a toothpick when inserted comes out with little gooey mix on it.
  10. Leave the brownies to cool and then leave it in the freezer for about 10-15 minutes.
  11. Cut into squares and prepare to be absolutely floored by it! (or so I hope!)


Tuesday 30 August 2011

Nigella's Mini Key Lime Pie

Well, as you can probably guess, I have an abundance of lime around me and so, I'm doing the best thing I can do with it, make pie! :) :) That and the fact that I got gifted Nigella's ' How to be a Domestic Goddess', which is filled with many many of such lime n lemony treats. Its truly a simple recipe and what I like about it is because we make it in small tart tins, it gives us scope for experimentation. The basic recipe stays the same, but you can always add different flavouring agents to it and so you end up a dozen or more pies, all in different flavours! An assorted pie tray of sorts. Well, I tried many of them. Tried the basic lime pie, key lime pie, orange pie, passion fruit pie and pineapple pie. Stayed on course with tropical fruit though. Its really simple, you should most definitely try it. You don't even need freshly squeezed juice to get the flavour, packaged organic juice works just fine. Nonetheless the name of the post is Nigella's Mini Key Lime Pie cause, well it is her recipe after all and all I've done is make changes to it.

Here is what you need,


  • 1 can of condensed milk
  • 2 egg yolks
  • 2 egg whites
  • 250 gram digestive biscuits
  • 100 grams of butter
  • about 4 tbsp of key lime/lime/pine apple/passion fruit/orange juice (Not all at the same time but you know that already. However, I wonder if adding spoonful of each would give it a carribean flavour?? Hmmm..I wonder)
  • A pinch of salt
Method:

  1. Pulse the digestive biscuits and butter together in a food processor until it forms nice buttery crumbs.
  2. Then press it into your mini tart tins. Take care to line the sides too.
  3. Leave in the fridge for atleast 30 minutes.
  4. Pre heat the oven to 170 degree Celsius.
  5. In a bowl, whisk the egg yolks together until it becomes thick.
  6. Continue whisking and add the condensed milk and the fruit juice of your choice. Mix well.
  7. In a different bowl, beat the egg whites plus the salt until it forms soft peaks.
  8. Now fold the whites in to the yolk mixture.
  9. Pour it into the biscuit base and bake for about 10-12 minutes.
  10. Leave it to cool completely. Refrigerate if possible.
  11. Serve! Yum!


The only disappointment I had with these pies, and it was more my fault than theirs, was that they looked a bit boring! I expected my lime pie to be green and my orange pie to be, well, orange and so on. I know I am being silly but really, these neutral colours broke my heart a little.:(

Monday 29 August 2011

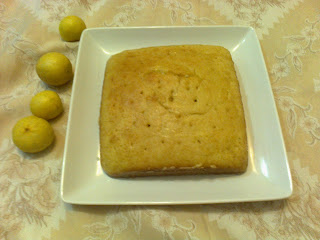
Simple Syrupy Lemon Cake

Notice how the most simple in life are the most worthwhile? Like you could party with the celebrities in the coolest clubs, yet it is a cuppa coffee you shared with a long lost friend that means more. Or how you can stock up on all the latest gizmos and phones and all that but there is nothing quite like a looooooong conversation made on your landline phone. Or you could sign up to a million social networking sites to keep in touch with friends but   it doesn't even to begin to hold a torch to a letter from a pen friend. A date could take you to the choicest restaurant and buy you the most expensive dinner but its most often the cab ride home that makes you wanna see him again.  There is nothing more appealing than holidaying abroad, well perhaps there is one thing more appealing, coming back home to your familiar bed. You get the drift of what I'm trying to say now, don't you? Well, just like that, you could make the fanciest cakes in the world with the most amazingly sinful frosting, yet there is nothing about it that warms your heart like a homemade syrupy lemon cake.

Made it yesterday after eons and it felt familiar, it felt nice, it felt like home.


Here is what you need,


  • 11/2 cups of flour
  • The zest of one lemon
  • 2 tsp baking powder
  • 2 eggs
  • 4 tbsp milk
  • 3/4 stick of butter
  • juice from 1 1/2 lemons
  • 100 grams of icing sugar
Method:
  1. Preheat the oven to 190 degree celsius.
  2. Cream together the butter and sugar until fluffy.
  3. Then add the eggs one by one and the zest of the lemon and mix well.
  4. Into it add the flour and baking powder and mix really well.
  5. Finish it off with milk and once again mix well.
  6. Pour the thick patter on to a greased and floured baking tin and bake for 40 minutes.
  7. In the meanwhile, mix together the lemon juice and icing sugar on low heat, until all the icing sugar melts and a lemony syrup is formed.
  8. Once the cake is baked, using a tooth pick or fork, poke holes all over the cake.
  9. Now pour the lemon syrup over the cake, making sure it reaches all the corners.
  10. Let it cool until all the syrup has been pulled in by the cake.
  11. Then, Dig in!!! 
**Note: I baked two cakes in a go, and so made a variation with the second cake. I used passion fruit for the second one and the only difference I made to recipe was to omit the lemon zest from the batter and instead add 1 tbsp of passion fruit juice. Also, for the syrup, lemon juice was replaced with passion fruit juice. Dare I say, the passion fruit version was slighlty more yummier than its lemony cousin. But I've featured the lemony cousin here cause its more "home" than passion fruit will ever be.


Friday 26 August 2011

Steamed Rice And Prawn Pie

Seen those bamboo steamers that are such a rage these days? Well, a few weeks back I happened to go travelling to the interiors of India and what do you know, the tribal have always been cooking with them. Infact, I happened to meet a very accommodating local who within a matter of minutes, chiseled out for me, my very own bamboo steamer. Yup, custom made! How cool is that? Anyways, today I decided to put the steamer to good use and baked my self a yummy steamed rice n prawn pie.

Here is what you need,

  • 1 cup Basmati rice or small grain rice (which ever is handy) soaked in water for a couple of hours
  • 5 cups of coconut milk (You could also use 3 cups coconut milk with 2 cups water if you like)
  • Pinch of sal
  • 1 cup cooked prawns
  • 1 onion finely diced
  • 2-3 cloves of garlic, finely chopped
  • 1 tsp chili powder/paprika
  • 1/2 tsp turmeric powder
  • a small piece of ginger, finely grated
  • a small knob of butter, melted
Method:

  1. In blender, mix together the pre soaked rice with coconut milk until a very smooth and runny batter is formed.
  2. Add the salt to it and mix really well. Keep aside.
  3. In a pan, pour a little oil and saute the onions until they turn translucent.
  4. Now add the garlic and ginger and saute for a couple of minutes.
  5. To this, add the paprika/chili powder, salt and the turmeric powder and fry until the raw smell disappears.
  6. Now tip in the cooked prawns and mix until everything is well coated with the spices.
  7. In a greased cake tray, pour half of the rice batter and allow it to steam for 10 minutes or up until it cooks and becomes firm.
  8. Then, lay down the prawns in a layer on top of the cooked rice batter and pour half of the remaining batter on top.
  9. Steam it for 5 minutes and then quickly pour the rest of the batter on top.
  10. Steam for a further 10 minutes or up until the pie is fully cooked. You could try the toothpick test to check if the pie is cooked.
  11. Remove from the steamer and give the pie a butter wash.
  12. Let the pie cool before transferring it to your serving dish.
  13. Enjoy!! Yum!

PS: I know it looks a little minimalistic and plain jane, but the flavour of the prawn and the melt in your mouth consistency of the pie more than makes up for it.

Thursday 25 August 2011

Cheesy Coriander Bread

Cheesy Coriander Bread. *Sigh*  Oh the smell that was wafting around the house whilst the bread was baking...Aah, I could just live off that smell. If you and I are going to be friends, then there an are three things you need to know about me.

1) I love bread. I can eat it all day long. I love bread with everything. From my curries, to my jam, to my butter, to even my white sauce. Everything is fine with a little bread by its side.
2) I adore cheese. Nothing is too cheesy (excepting pick up lines :P ) Cheese is the Mary Poppins of the food world. You can put cheese in my tea and I might throw out the tea but rest assured the cheese will find its way into my tummy.
3) Coriander. The best herb ever. I love my curries and no curry is complete without coriander. Call it cilantro, call it coriander, call it what you may but if you are talking spicy and talking garnish, coriander better be on the plate.

So, cheesy coriander bread. Need I say more? 

Here are the things you need,

  • 4 cups of flour
  • 2 1/4 tsp of dry yeast
  • 11/2 cups of warm milk
  • a pinch of salt
  • Finely chopped coriander, including the stalk. How much depends on how much you like its taste
  • Grated Cheddar
  • 3-4 cloves of finely chopped garlic.
  • One egg
Method:

  1. In a bowl, mix together the yeast and milk well until all the yeast has dissolved.
  2. Now add the salt to the milk.
  3. Then quickly add the flour little by little until it forms a ball. Knead for a minute or two until flour and milk is well mixed.
  4. Cover the dough using cling film and leave it untouched for a couple of hours or until the dough has doubled in size.
  5. In a different bowl, mix together the grated cheese, coriander and garlic and keep aside.
  6. Once the dough has risen, knead if for a couple more minutes and divide it into 12 balls.
  7. Roll out the balls into small circles, using a little flour to prevent it from sticking to the rolling pin.
  8. Now scoop a little of the cheese and coriander mixture on to each of the dough circles and seal off the edges to form a semi circular shape.
  9. Arrange them on to a greased bread loaf tray, so that they overlap one another.
  10. Let it rest for another 20-25 minutes
  11. Once risen, brush them with egg and bake in an oven pre heated to 180 degree celcius for 30 35 minutes.
  12. Serve!!!


Wednesday 24 August 2011

Bourbon biscuit ice cream and butterscotch sauce

Ever been in a situation when you are gonna have guests over and you plan and plan about the various courses and completely forget about dessert? Anybody? Somebody? Nobody? Well, It looks like I am the only person to get into fixes like this. Hmmm..It so happens that I have friends over for dinner tonight and I wanted everything so purffect that I spend eons of time planning on what the appetizer and main course would be and the scatterbrain that I am, completely forgot about dessert. I know, unforgivable right? I mean, the dessert is my most favourite part of the meal and still I somehow forget about it. And so here I was thinking I would pick up a cake or a tart or something else sweeter still from my local bakers when like a beacon of hope, Nigella Express began on TV. There are times when leaving the TV on with no one watching it pisses me off, but today was not one of those times. I just grabbing my keys on my way out when I heard Nigella go on and on about a quick fix dessert and boy was it easy or what. Its so simple that I'm sure most of you know about it already but to me it was lifesaver. Its a quick fix dessert and so quick that it already in the deep freeze and I even have time to write about it. It totally deserves a post dedicated to it.

Here are the things you need,

For the Ice cream:

  • 1 medium tub vanilla ice cream
  • 1 medium packet of bourbon biscuits
  • 1 cup chocolate chips (or in my case the left over scraps from my Orange n Choco Chili snaps)
For the butterscotch sauce:

  • 2 tbsp white sugar
  • 3 tbsp brown sugar
  • 2 tbsp butter
  • 250 ml of cream
  • A dollop of honey
Method:
  1. Leave the ice cream to thaw in a mixing bowl
  2. In a zip lock bag, put the biscuits and chocolate chips and pound the living living daylights out of it.
  3. Add it to the thawed ice cream and whisk it all together really well.
  4. Pour in into a cake tin and return to deep freeze for the ice cream to set
  5. Now, in a pan, bring to boil the butter, honey and the sugars until it caramelises.
  6. Then take it off the heat and let it cool slightly.
  7. Add the cream to the sugars and mix well.
  8. Reheat it slightly before serving.
  9. Pour over the ice cream and enjoy!

 I so wanted a pretty pic of a slice of ice cream with the sauce on it, but in the mad rush of having people over, I completely forgot. However, the ice cream was a raging success. I personally thought that there was no need for the sauce as the ice cream itself was so good.

Monday 22 August 2011

Chocolate and Almond cake

Honestly, there has been so much of yumminess about of late, that I just cannot seem to get the time to try everything. Case in point, Sugar Slut's Honey and Almond Cake. It looked so divine and so 'gotta have it' that well, I couldn't resist. And today, that's exactly what I made, well almost. Now is about a good time know this about me, but I absolutely detest making short runs to the supermarket. I mean, I do go grocery shopping, but once a week or once in two weeks is all the shopping I can take at a time.Why am I saying all this? Well, it was only after I began get the ingredients together that I realized that I was short of honey and so, I decided to improvise. Yet again. Instead of honey, I used chocolate and the result was, thankfully not disappointing.Not that you can ever go wrong with chocolate. The best part about the cake is its understated sweetness. Its such a perfect companion to your tea and nothing about this cake is overpowering. Its harmonious, if you know what I mean. However, from the aesthetic point of view, I think the Honey and Almond cake kicks the Chocolate and Almond cake's rear! Perhaps I should have put some sorts glaze on the cake to mimic the honey effect. Anyways,

Here are the things you need,


  • 1/2 a slab of chocolate (about 125 grams)
  • 1/2 cup sugar
  • Juice of 1 lemon
  • 100 grams of butter (close to a stick)
  • 1 1/2 cups of flour
  • 2 tsp baking powder
  • 1 cup of almond flakes
  • 2 eggs
  • 1 tbsp milk (only if necessary)
Method:

  1. Preheat the oven to 170 degree Celsius. 
  2. In a pan, gently simmer the chocolate, sugar, lemon juice and butter until it forms one smooth mixture.
  3. Then remove from heat and quickly add the eggs one by one, whislt stirring well.
  4. Then fold the sifted flour and baking powder mix into the egg mix
  5. Once you've folded everything together, if the mix appears a tad too thick, then add about 1 tbsp of milk to it to slightly smoothen the batter, otherwise, omit the milk.
  6. Now pour half the batter to a buttered cake tin and then stop to sprinkle some almond flakes.
  7. Pour the remaining batter on top and sprinkle some on almond flakes and bake for about 30-35 minutes.
  8. Serve!!


Note:
My batter required the addition of milk because it was a tad too thick for my liking, perhaps because I used a special edition Brazilian chocolate bar which had a sticky consistency. Like I've mentioned above, check if your cake batter really needs the milk before adding it.

Friday 19 August 2011

Orange n Choco chili snaps!

Ok, so ever since I saw Procrastobaker's Peppermint Crisps, I've been dying to bite into one. I mean, Chocolate and peppermint are two of my all time favourite things and here it was both together in one amazing looking cookie. I couldnt wait to make it and one of the first things I did today morning was to make up my mind make it today itself. It only required minimal ingredients, all of which was there in my pantry. Turns out I was wrong. I did not have peppermint extract and there cannot be peppermint crisps without peppermint, now cant it? But I was so looking forward to my chocolate fix and so I did what I do best, Improvise. I knew I definitely had orange extract in my kitty and plus there were a couple of fresh oranges handy, so I decided that instead of peppermint, orange it would be and so was born my orange and choco chili snaps. Why snaps and not bars or cookies? You'll know soon enough. :)

Here are the things you need,


  • 250 grams of chocolate chips or roughly chopped bars
  • 1/2 cup sugar
  • 1/4 cup grated coconut 
  • 1/2 tsp orange extract
  • 1/2 cup water
  • 1 tbsp zest of orange
  • 1 tbsp orange juice
  • 1 green chili cut along the length (for a bit of spice. Omit if you are not a chilly fan) 
Method:

  1. Boil water,sugar and chili together until all the sugar dissolves.
  2. Then remove the chilly and let the sugar syrup remain untouched until it caramelizes. As soon as it the sugar syrup changes colour and turns a pale yellow, switch off the heat.
  3. Now add the orange extract and swirl the pot to incorporate the sugar syrup and the extract.
  4. Now in a baking tray lined with parchment paper, pour the sugar syrup and let it sit for 15 minutes or until it hardens.
  5. Once it hardens, break the sugar into pieces and pulse it in a food processor until it becomes sandy.
  6. On double boil, melt the chocolate and remove from heat.
  7. Then add the coconut, orange juice and the finely ground orangy sugar. Mix well.
  8. Once again, in a baking tray lined with parchment paper, spread the chocolate mix evenly
  9. Sprinkle the orange zest on top and refrigerate for 1-2 hours.
  10. Serve! Yummy!

Apologies for the really poor photograph. Its that, as soon as I was taking the chocolate off the fridge, in walked my 6 year old niece with her gang of friends and this pic was all I could manage before the attack. :)

Few notes:
** Because I live in a humid environment, the formation of the orange sugar sheet was extremely tricky as the moment I took it out of the fridge the sugar would turn sticky. So, all those people living in hot and humid conditions, keep this in mind and take care to pulse the sugar sheet into sandy sugar only in the last minute just before you add to the chocolate mix.
**Also, if storing, keep the chocolate under refrigeration as well, the humidity can cause it to melt.
** And finally, why did I call these chocolate bars, SNAPS? Because, I forgot to score the chocolate before setting it to harden and so had no choice but the snap the chocolate. I had no shapely chocolates! but it tasted awesome nonetheless!

Thursday 18 August 2011

Crispy Fried Cauliflower Florets

As a person I like to multi-task. I am never doing only one thing at a time and most of the times I get pulled up for this. Like, I can never read only one book at a time or I can never only just be watching televison, I just have to constantly work other things in to the equation. Like when I am baking cookies, I have to make ice cream with the crumbs, or I have to be on phone when I am watching television or sometimes even reading a book. Most of the times it can be rather annoying to the people around me, but like I keep telling them, "trust me, I have a system". So, quite naturally, I am partial to vegetable that can do two things at once, like my little cauliflower florets, which can  be appetizers/ snacks and then made into a curry in a jiffy.I have prepared crispy fried cauliflower florets today, but I'll show you how in a few quick steps it can be made into yummy curry too.

Here are the things you need,

  • 1 large cauliflower cut into little florets
  • 1 cup all purpose flour
  • 1/2 corn flour
  • 1 tsp paprika/chilly powder
  • salt to taste
Method:
  1. Mix together the flour, cornflour,paprika and salt together along with water to form a thick batter.
  2. Dip the cauliflower florets into it and coat it with the batter well and fry it in oil.
  3. Serve!
Now, if you wanted to make a curry out of it, then this is what you would have to do,

  1. In a large pan, saute diced onions, green chillies, finely diced ginger and garlic.
  2. Then add diced bell peppers to it and saute until slightly soft.
  3. Now add some soy sauce and tomato sauce and mix well.
  4. Now add the fried cauliflower florets and toss it well, until the sauce coats everything.
  5. Mix a 2 heaped tsp of flour with water and pour into the pan. This will thicken the sauce. If however, the sauce seems too think, then add a little more water to dilute it.
  6. Let it remain on heat for 2 minutes and then serve hot! 


Wednesday 17 August 2011

One step chicken curry or Delicious Onion chicken curry (I cant decide on a name!)

Who doesn't love a good curry? Particularly in England's wet weather, there is nothing that can keep me quite warm inside like a good spicy curry can. Most of the people I know are game for dinner of curry yet they all shy away from making one. Why you ask? Because curries always involve a lot of frying, grinding, mixing and seasoning of masalas and one wrong step can frankly ruin the flavours. So, for all of you who fancy a curry but don't wanna spend time on it. Here is a recipe for you. Came across it by chance and loved it when I ate it and then swore by it when I got the recipe. It is literally a one step chicken curry.

Here is what you need,

  • 1 kilo Chicken with bones (Don't really fancy boneless chicken unless the recipe absolutely calls for it)
  • 1 kilo Onions coarsely chopped
  • 1 bunch of curry leaves
  • 3 tbsp oil
  • 3 tbsp paprika
  • 2 cloves of garlic finely chopped
  • 1/2 tsp of garam masala
Method:
  1. In a pot, add the chicken and all the other ingredients and mix it all together thoroughly.
  2. Now put the pot on simmer and cook until the chicken is nice and tender
  3. Serve!
Simple, innit? So no more excuses for curry truants. You have to try this. Lemme know how it worked out for you. 

** Instead of curry leaves, I've tried the recipe with coriander leaves and the result was still yummy. So feel free to try different herbs if you like


**I know, Its about time I got a new camera and stopped relying on my sad sad mobile phone. :(

Tuesday 16 August 2011

Little chubby egg bites

You know how unfair the world is to an egg? Its always with us for everything yet it never gets to enjoy the glory that chocolate or salmon or even chicken gets. NOT FAIR. You know, the egg reminds me of those studious kids, dare I say nerds, from high school. We need them for everything, from getting those sci-fi effects for class parties to loads of help with trigonometry and algebra and we sometimes even need them to bail us out of our sticky messes. Yet, they never enjoy the attention that the pretties and jocks get. The egg is much the same. From making a custard to delicious chocolate cake, we need them eggs for everything but we never give them their due. So in protest against their unfair treatment and in support of well..eggs..I dedicate the following recipe to them. Its so simple yet such a hit as a party snack. You go eggsies!!!

Here are the things you need,


  • 3-4 eggs
  • 1 cup of Gram Flour/Chickpea Flour
  • 1 tsp Chilly Powder or Paprika
  • 1/2 a bunch of coriander leaves finely chopped 
  • Salt to taste
  • Oil for frying 
See, dint I tell you it was simple,
  1. Hard boil the eggs and cut it in quarters
  2. Mix together the flour, chilly/paprika powder, salt and coriander leaves to form a thick batter
  3. Now drop the quartered eggs in to the batter and coat it well
  4. Drop it in piping hot oil and fry it until golden brown. The oil has to be piping hot so that it does not drink up the oil.
  5. Serve! Yummy eggs!
  6. Oh and for sauce, just make a normal sauce, one part tomato sauce and one part mayo. No sweat!
Ok, dont raise your eyebrows. Just because its so simple, it isnt tasteless. Infact from all the snacks that I serve when I have friends over, this is the only one where I never seem to have leftovers. So there you go, the little chubby egg bites. I love!


Monday 15 August 2011

Crumbly silky chocolate pie

The first thing I read today morning was a post by Tara of Butterdish and everything about the post touched me. It was moving and inspiring and it made you wanna bake, not for yourself but someone else. This chocolate pie was a result of that post. Agreed, the post asked for a peanut butter pie but due to certain reasons, I just could not make a trip to the supermarket and so had to make do with what was in my pantry. Well, the pie turned out B E A U T I F U L. It was just like its name, crumbly, silky, chocolaty and felt velvety in the mouth. I wish I could have shared a slice with you, just so that you would know that I am not fibbing. You must try this!

Here are the things you need,

For the crust:

  • One 250 gram packet of Bourbon biscuits
  • 50 grams of butter
For the filling:

  • 2 squares of chocolate bars (approx 250 grams)
  • 1/2 cup boiling water
  • 1 tbsp gelatin
  • 1/4 cup cold water
  • 1 tsp vanilla essence
  • 1 tbsp zest of orange (for a tangy-ness only) 
  • 1/2 cup sugar
  • 2 eggs, separated (not divorced, only separated..sorry sad joke, I know)
Method:
  1. Mix together the biscuits and butter together in a food processor.
  2. Now tip the mixture on to your tart tin and press it in so that it spreads evenly. Make sure it covers the edges of the tin too
  3. Refrigerate the crust for about 30 minutes.
  4. Now, mix the gelatin in cold water and allow it to  rest for 15 minutes
  5. Boil 1/2 a cup of water and mix the chocolate in to.
  6. Once the chocolate is fully melted, add the gelatin and bring the mixture to a simmer.
  7. Keep stirring until all the gelatin has dissolved.
  8. Now add 2 egg yolks to the mixture and mix
  9. Then add the vanilla essence.
  10. Take off from heat and allow the mixture to cool. 
  11. Now, whip the egg whites with the sugar until it forms still peaks.
  12. Fold the cooled chocolate in to the mix and pour into the tart tin.
  13. Refrigerate for 1-2 hours.
  14. Serve! Yum!


Friday 12 August 2011

Chicken spring rolls

Well..this one really is a no brainer..something which most of us already know to make, I presume but nonetheless this is my dish of the day. Whats wonderful about this dish is that its multifaceted. Combine it with a good salad and some yummy sauce and its main course. Serve it alongside a drink and it becomes a snack. Pack and send it to school with you and its a kids meal. You can always play with the filling and the protein that you choose to put inside it but what I have done today is a pretty much straightforward version of the dish.

Here is what you need,

Shredded Chicken - 2 cups
Onion - 1 finely diced
Garlic - 3-4 pods finely diced
Carrots - 2 thinly sliced
Beans - 1 cup thinly sliced
Soy sauce - 1 tbsp
Chilly sauce - 1/2 tsp
Eggs - 2
Corn flour- 1 cup
Flour- 2 cup
Bread crumbs - 1 cup
Salt- To taste

Saute the onions and garlic well and add the carrots and beans to it. Continue to cook until the vegetables are half cooked.

Now add shredded chicken and cook. Remember to keep all the vegetables and chicken soft

Now add the sauces and mix well.

Season it with salt. Keep aside.

Now mix the flour,cornflour, one egg and water together and make a batter like a pancake batter (not too think, not too runny)

Now spread it on an oiled pan thinly, in the size of a large pancake.

Spoon a bit of the filling to the center of the pancake and roll it. Take care to tuck in the sides as you fold the pancake to seal off the edges.

Now dip in the roll in a whisked egg and coat it with bread crumbs and fry in oil.

The dipped and crumbed spring rolls can be stored in your freezer for up to 2 weeks and can be fried as and when required.


Thursday 11 August 2011

Lemony chicken and chilly potato

So today I saw this recipe for a lemony chicken on TV that I just had to try. It looked so yum and tender on TV itself that I could only imagine how lovely it would be if I tried it out. Well, I added a few additional things to it to make it a tad more spicy. Nonetheless, you should try it out too..Its really minimalistic in terms of the ingredients but the final product is uber awesome. Infact, all you guys out there with access to TLC, you should check out their Family Food Fights. Its a treasure house of traditional family recipes.

Here is what you need,

Chicken - Leg or Breast pieces
Zest of one big lemon
Zest of one lime
Grated Garlic - 4-5 pods
Juice one 1 lemon
A touch of grated ginger
Black Pepper powder - 1/2 tsp
Coriander leaves - One bunch, finely chopped
Potatoes - 2-3
Chilly flakes- 1 tbsp
Onions - 2 (cut into rings)
Salt to taste

Marinate the chicken using the zest of lime, lemon, coriander leaves, pepper powder, lime juice and salt and set aside for a minimum of 30 minutes. (The more the better)

Then, lightly oil a pan and fry the chicken until golden brown. Remember to cover the chicken as it fries to eliminate the need for more oil.

Once fried remove the chicken and rest it on kitchen tissues.

Now toss the already boiled and diced potatoes in to the pan in which the chicken was fried, along with the onions and chilly flakes.

Add a splash of lemon juice to the potatoes to give it a zingy effect.

Saute them for about a minute or two.

Serve the chicken on a bed of spicy potatoes and onion.


Wednesday 10 August 2011

Stuffed Bananas

Ok, so we haven't done sweet in a while and so today I thought we would make something yummy, sweet! Wanted something exotic and not the everyday cookie, so I ended up making these flavoursome, most definitely sweet stuffed bananas.  I admit its not an everyday treat, but on those days when you feel particularly exotic or wanna surprise your guests with a luxuriant dessert, this is the way to go. Very few ingredients required but the product is particularly lovely.

Here are the things you need,

Medium ripe bananas - 3-4
Grated coconut - 1 cup ( I prefer freshly grated coconut to the desiccatied variety because the juices from the freshly grated ones impart such a different flavour to the dish)
Cardamom powder - 1/2 tsp
Granulated Sugar - 3 tbsp
Broken Cashew nuts - 1/4 cup
Raisins - a handful
Butter - 2 tbsp
Oil - For frying

Steam the bananas until tender, but not overtly tender and then mash it.

Divide the mashed bananas into fist size balls and keep aside.

Heat the butter and toss in the nuts and raisins and roast them.

Then add the cardamom powder and the coconut and fry it until the coconut loses more than half of its juices.

Turn off the heat and then add the sugar. Combine it well.

Now, take a banana ball and flatten it using your palm, scoop in some of the coconut mixture to the center and seal off the edges.

Then fry it in oil until lightly brown

I've chosen to do a missile like style while shaping the banana balls, though you may chose the style you like.


Tuesday 9 August 2011

Fried Prawn Patties

So, this recipe is finger licking good. The good thing about this  is that its versatile. So, while I've used prawns here, the recipe lends itself fabulously to chicken, meat and even vegetarian options. You surely must try it out now. No excuses!

Here are the things you need,

For the patties:

Rice flour - 1 cup
Fennel seeds - 1/4 tsp
Grated coconut - 1/2 cup
Water - 1 1/2 cups
Salt - 1 tsp

For the filling:

Cooked prawns - 250 grams
Onion - 1 (Finely diced)
Garlic - 3-4 cloves (Finely diced)
Chilly powder - 1 tsp
Turmeric powder - 1/2 tsp
Salt - to taste
Oil  for deep frying

In a blender, mix together the grated coconut and fennel seeds thoroughly.

Bring the water to boil in a large bowl.

As it boils, add in the rice flour, the coconut-fennel mix, salt and mix well.

Remove from heat and knead the mix into a soft dough.

Make fist sized balls of dough and keep aside.

Heat a little oil in a pan and add the diced onion and garlic and allow it to saute.

Then add the salt, turmeric and chilly powder to it till the raw smell of the spices disappear.

Now, quickly add the prawns to the pan and mix well.

Since the prawn is already cooked, we only need to keep the pan on heat until all the spices and prawns are well mixed.

Heat oil in a deep bottomed dish. The oil must be really hot so that when we fry the patties, it does not soak up excess oil.

While the oil is heating up, spread a little oil in you hands and flatten out the dough balls into approximately a pancake size using your hands. 

Scoop a little of the prawn mix into the center of the dough and bring the edges of the dough together. Seal the edges well by pressing on it hard, so that no oil gets inside the patty as we fry it.

Now, drop the patty into the oil and fry it until it turns nice and golden brown.

Serve.

While, I've chosen to do a half moon kinda shape for the patty, you could mold them into balls, squares or basically any shape that you fancy. The key here however is that no matter what shape you choose, remember to seal the edges cause otherwise oil will enter the filling and your patties will become soggy.


Monday 8 August 2011

Creamy coconutty wheat soup

A yummy, creamy coconut soup that is at once both rich yet extremely healthy. Its flavours are amazing and its so filling that a small serving can be a meal in itself. Sometimes combined with a curry, this soup is a staple during the month of Ramzan, specially in the southern part of India.

Here are the things you will need,

Broken wheat/ Whole wheat - 1/2 cup
Boneless Chicken - 2-4 bite sized pieces
Coconut Milk - 2 cups
Ginger - 1 small piece
Cinnamon stick - 1/2 a stick
Shallots - 3-4 finely diced
Butter - 4 tsp
Salt - to taste

Cook the wheat, chicken, stick of cinnamon and the piece of ginger together till the wheat is well cooked. If using a pressure cooker, the average time for cooking is about 15 minutes.
1/2 a cup of wheat usually requires about 2 cups of water to cook. So remember to add water according to your measure of wheat.
Once well cooked, remove the ginger and cinnamon from the mix and blend the remaining items. 
Pass it through a strainer.
Now, add the coconut milk to the mixture and mix well. Slightly simmer it for a minute. Season
On a separate pan, add the butter and saute the shallots till it becomes translucent.
Now sprinkle the butter sauteed shallots on to the soup and serve.

The soup is just perfect in itself but for those lovers of spicy, try adding a a few spoonfuls of your left over chicken/beef/mutton curry to the soup and lo behold its godsend..Really!


Friday 5 August 2011

Creamy Spinach

Here is yet another recipe to turn those reluctant veggie eaters into religious veggie eaters. Yum! Creamy Spinach!

Here are the things you need:

Spinach - 1 bunch, washed and dried
Onion - 1 (Roughly diced)
Garlic - 2-3 cloves (Roughly diced)
Lemon - One half
Cream - 1 cup
Butter - 2 tsp
Salt - To taste

In a pan, heat oil and sweat the onions and garlic.
Then add the cream and butter to the mix along with the salt and allow the mix to reduce slightly.
Once the reduction has begun, add the spinach to it and let the leaves wilt down.
Once the spinach has begun to wilt, remove the pan from fire.
Squeeze one half of the lemon on to the spinach and toss it well so that the sauce spreads on the leaves evenly.

This dish works perfectly with almost any main course and better still, almost any veggies can be used instead of the spinach. All you need to do is keep in mind the difference in cooking time of the different veggies.

Pic courtesy : Diana's kitchen

Mac n Cheese with Veggie surprise

So, who doesnt like Mac n Cheese. Kids especially gobble it up without a question, so I thought maybe I could hide in a layer of veggies in it and make the treat a tad more healthy.

Here is what you need:

Macaroni - 200 grams
Butter - 50 gram
Mushrooms - 500 gram
Milk - 1 cup
Flour - 1/4 cup
Pepper - 1 tsp
Turmeric - 1/2 tsp
Cheese - 4 cubes grated
Onions - 1(Finely diced)
Garlic - 3-4 cloves (Finely diced)
Bread Crumbs - A little
Salt - To taste

Boil the macaroni as per the instructions on the pack and toss it with olive oil and keep aside. Remember to lightly salt the macaronis while cooking.
Now heat a pan and add the butter to it. Add a tsp of olive oil too to raise the burning point of the butter.
Now saute the onions and garlic in it.
Gradually sprinkle flour in to it until well combined.
Now remove from heat and very slowly add the milk to the mixture to form a nice sauce.
Bring the mix back to simmer and add the cheese until all of cheese melts. (Remember to save a same portion of the cheese for sprinkling on top of the final dish)
Now add the cooked macaronis into the sauce and give it a good mix.

In another pan, pour a little oil and add the mushrooms along with the turmeric, salt and  pepper.
Put a lid on it and cook the mushrooms until half tender.

In a baking tray, spoon in the in the macaroni mix. Top it with the sauteed mushrooms. Finish it off by sprinking bread crumbs on top and then a little bit of grated cheese.
Bake at 175 degree Celsius for 20 minutes.
Let it rest for 5 minutes before serving.


Thursday 4 August 2011

Stuffed Bun

 Here is another easy snack. A svaoury snack this time. Easy and quick to make, though there is not much baking involved unless you decide to bake the bun yourself, in which case, the recipe turn not so easy. :)

Things you need:

Buns
Onions - 1 (Finely diced)
Garlic - A whole head (Finely diced)
Ginger - a small piece
Chopped Beef - 500 grams
Salt- to taste
Egg - 1 (to coat the buns)
Chilly powder - 1 tbsp
turmeric powder - 1 tsp

Place the beef in pan and add salt, chillie powder and turmeric powder and leave it on fire until well cooked. Alternately, you could use a pressure cooker and cook the beef until tender.
Once cooked, place the beef in food processer and finely mince it.
Now heat a pan and saute the onions in butter/oil until they turn translucent.
Then add the diced ginger and garlic and saute them till they turn brown
Now, add the minced beef to the pan and gently fry it.
You can also add a bit of cilantro or celery to give it some extra flavour. .
Keep Aside until to cools down slightly.
Now slit the buns 3/4ths way to enable stuffing the beef.
Pack the buns tightly with the fried beef mince and press the buns between both your palms to keep it firm.
Then brush the buns with a whisked egg.
You can now either fry the buns lightly in oil or can place in on a baking tray and bake for roughly 10 minutes at 150 degree Celsius.

The advantage here is that the stuffed bun (before the baking/frying stage) can be made and stored for a few days. Its a great snack and its very filling too.


I know. the pic doesn't look it but trust me, those buns were delicious!!


Tuesday 2 August 2011

Marble Cake

One of the simplest tea time treats. Stores well and liked by almost everyone.

Things you need:

Butter - 2/3 cups (but really you can never have too much butter.)
Sugar - 1 cup
Eggs - 2
Flour - 1 1/4 cup
Baking soda - 1/2 tsp
Baking powder - 1 tsp
Cocoa - 4 tsp
Curd - 1 cup
Orange essence - 1 tsp ( i decided to give my marble cake a twist and replaced vanilla with orange essence. If you are not a fan of orange or if you like the traditional way, stick to vanilla essence)

Pre heat oven to 180 degree Celsius
Cream butter and sugar until fluffy.
Then add the eggs one by one and whisk until the mixture is light and airy.
Then add the curd and whisk for a further 50 seconds on medium speed. Do not whisk excessively lest the mixture loose its air.
Now add the essence and mix with a spoon.
Fold in a mixture of flour, baking soda, baking powder in to the egg mix gently.
Once the mixture is well combined, divide the mix into two portions.
Fold in the cocoa to one part.
Now on a well greased baking tray, pour in the mixes alternately.
Once done, drag a toothpick through the mix to create the marble effect.
Bake for 40 minutes.
Serve.


Monday 1 August 2011

No Frills Chocolate Cupcakes

Like I said, absolutely no frills. Simple and easy

Things you need:

Flour- 1 cup
Cocoa powder - 1/2 cup
Baking powder - 2 tsp
Salt - 1/4 tsp
Vanilla essence - 1 tsp
Sugar - 1 cup
Butter - 1 cup
Eggs - 3
Milk - 1/4 cup

Pre-heat oven to 175 degree Celsius.
On low speed or by hand whisk together the butter and sugar till its light and fluffy.
Now add eggs one at a time and whisk well.
Mix the flour, salt and baking powder well.
Also, mix the milk and vanilla essence.
Now add one part of the flour mix to the whisked egg mix and fold it in.
Then add one part of the milk mix and fold well.
Go on doing this alternately till all the flour and milk is well incorporated in to the egg mix.
Now, spoon the mix into the cupcake/muffin tray, about 1/2 or 3/4 full and bake for 20-25 minutes.


Easy Peasy Yummy Brownies

This is such an easy recipe and the best part is that there is hardly any prep time required. Trust me, once you try it, you will be hooked for life.

Things you need:

Flour    - 3/4 cup
Butter   -1/2 cup
Vanilla extract - 1 tsp
Eggs - 2
Sugar   - 1/2 cup
Semi Sweet chocolate - 120 grams
Salt - a pinch

Ganache frosting

Butter - 1/4 cup
Chocolate - 100 grams
Cream - 3 tbsp (optional)

For the brownie:

Pre-heat oven to 170 degree Celsius.
On a double boil melt sugar and chocolate and mix well.
Remove from heat and quickly add the sugar and mix well.
While the mix is still warm add the eggs one by one and whisk well.
Then add the flour and salt mix and combine it well with the chocolate mix.
Pour it in to the greased pan and bake for 25 minutes or until a toothpick comes out clean.

For the ganache:

Melt chocolate, cream and butter on double boil till it mixes well. Then remove from heat and pour over the cooled brownie and refrigerate for 10 minutes till the frosting hardens. Cut into squares and serve.

Pic courtesy, Finecooking.com

Disqus for Cook's the word